Getting Started
SaaS Cancellation FlowsHow Raaft works
Connecting your Payment Processor


Technical Set Up
Creating Flows
What is a FlowRetention OffersMultiple active FlowsFAQsUsing the Raaft App
DashboardReportingCustomers At-riskZapier IntegrationConnecting Stripe
Connecting your Raaft account to Stripe is pretty simple.
Explainer Video
Here’s a short 1-min video with the connection instructions.
Step 1: Select Stripe as your Payment Processor
The first step is to open the payment processor connection pop-up.
You can do this in 2 ways:
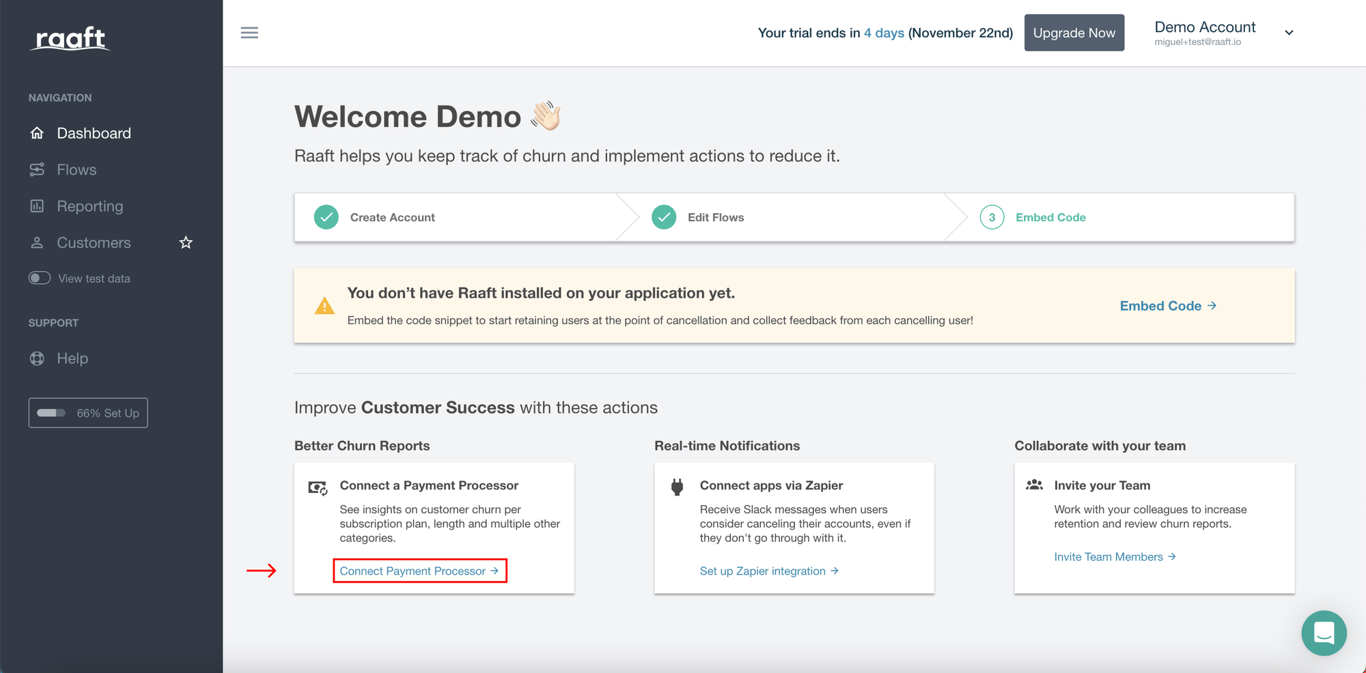
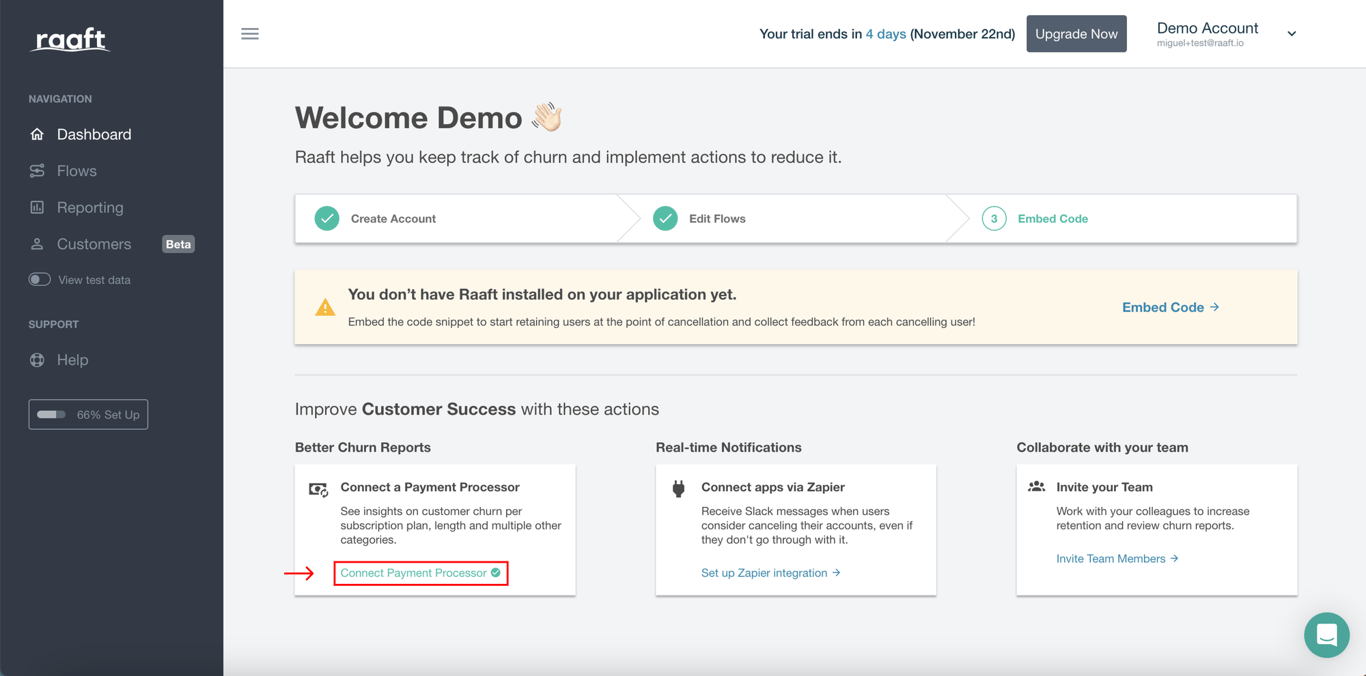
- From your Dashboard, if you just created an account and don’t have data yet you can just click on Connect Payment Processor.
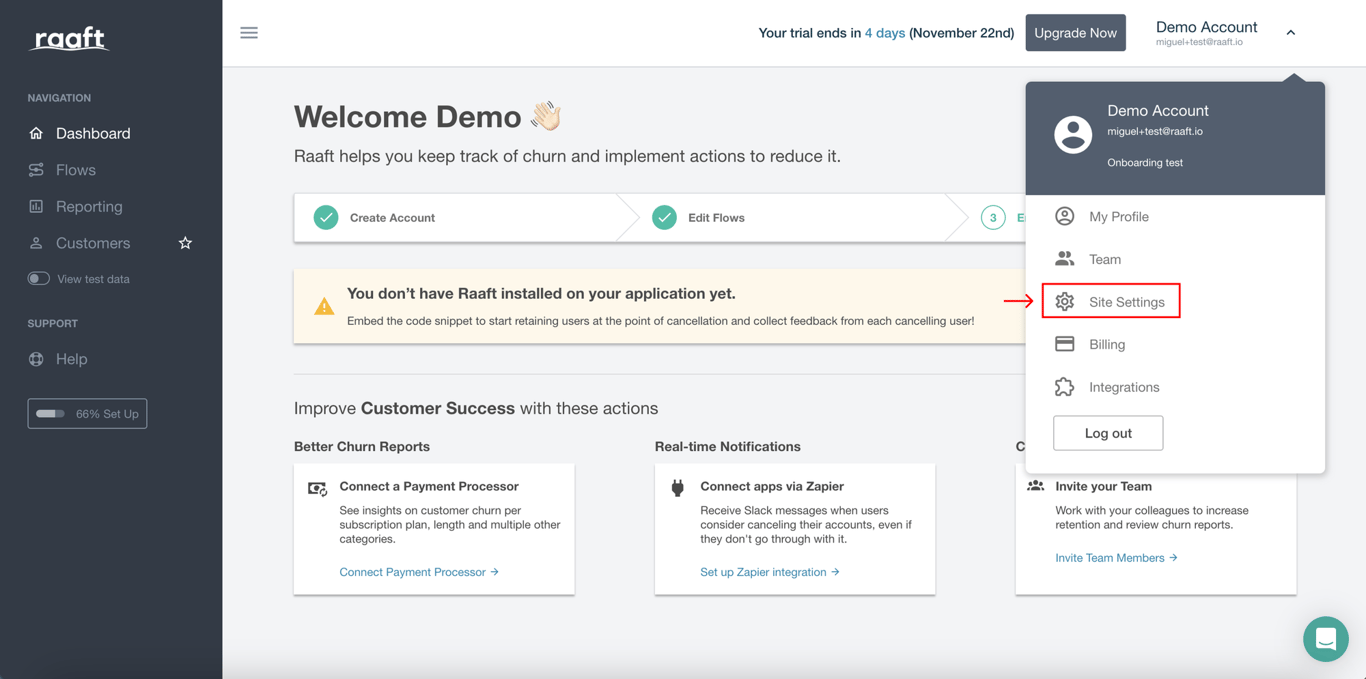
- From your navigation bar, click on your Account Name on the top-left to open the dropdown menu and then click on Site Settings.
Then, scroll down to the Payment processor menu and click Select Processor.
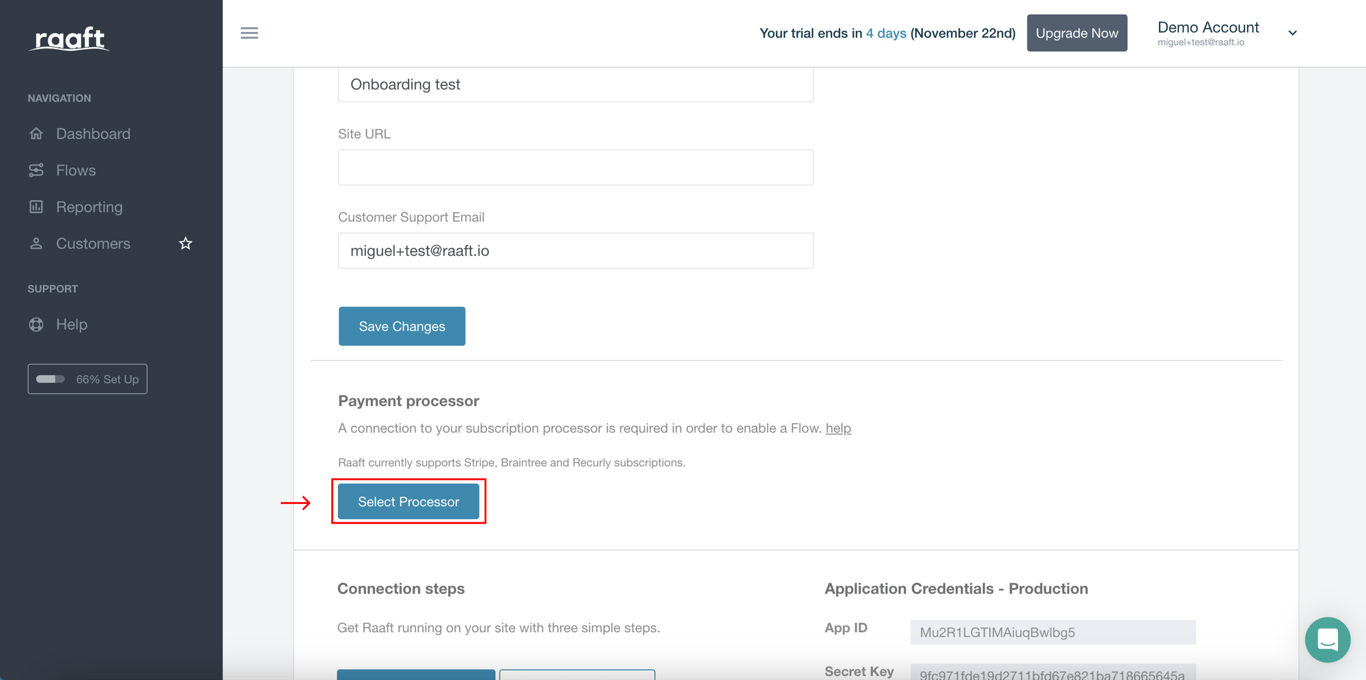
Using any of the methods above, you’ll see the following pop-up. Select Stripe as your payment processor.
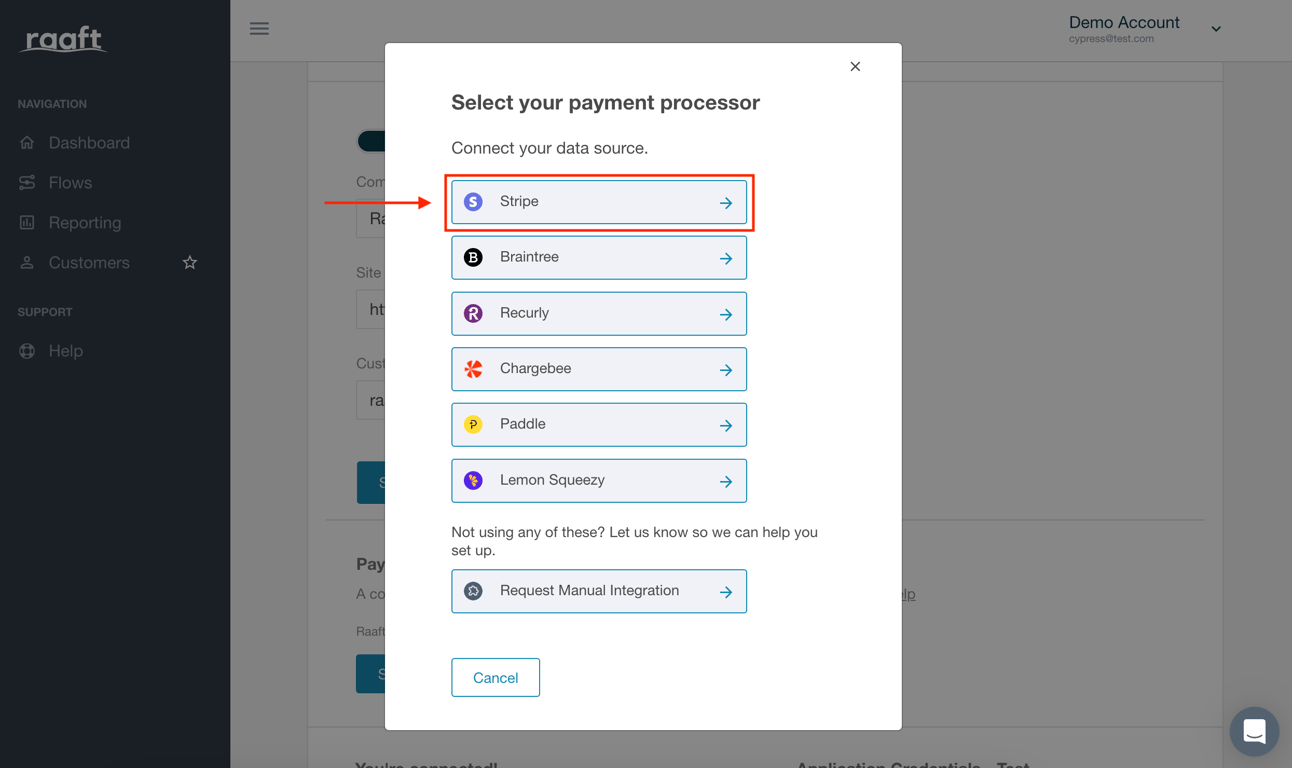
You’ll be redirected to the Stripe log in page.
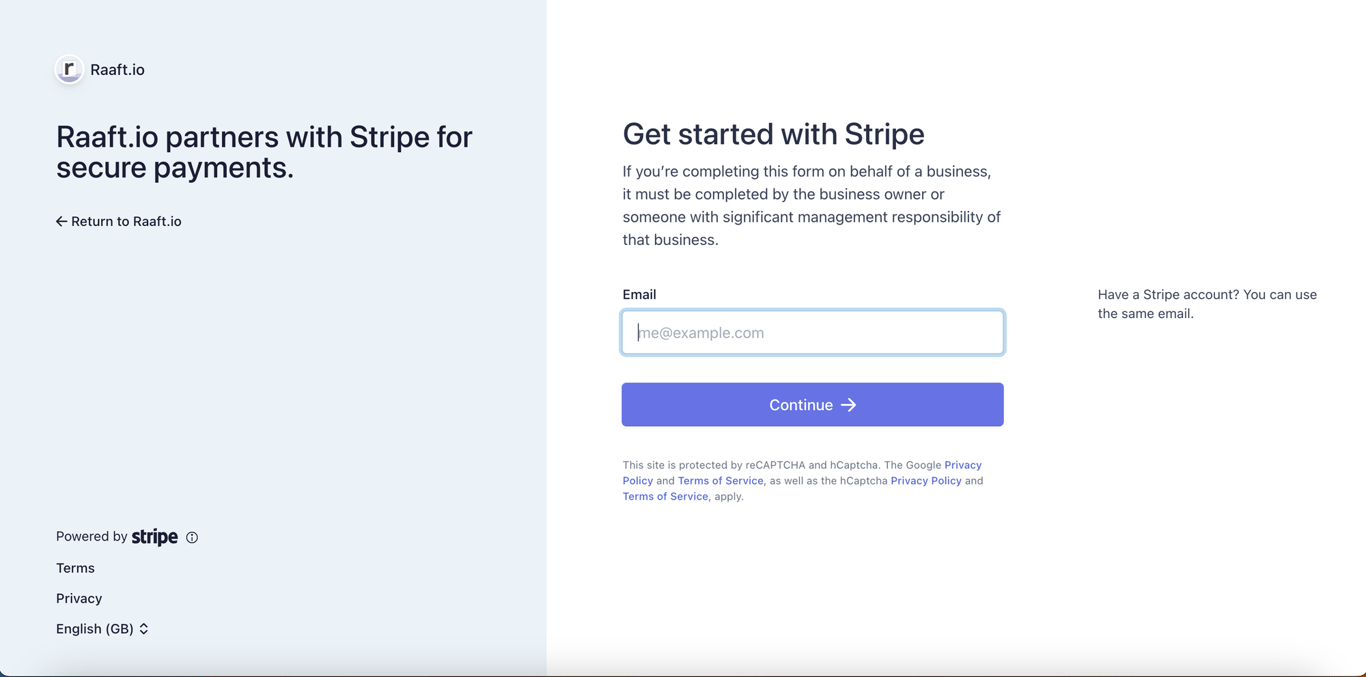
Step 2: Log In to Stripe
When you’re redirected to Stripe, all you need to do is log in to connect your account.
Warning: You need Admin permissions or Connect Roles to be able to establish the connection. View the list of Stripe roles here.
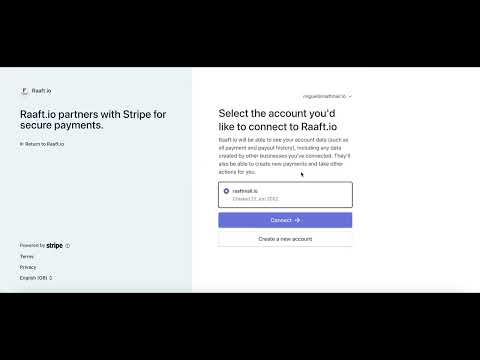
Step 3: Connect Stripe
If you have the permissions, you’ll log in and then see an option to Connect the account, as you see below.
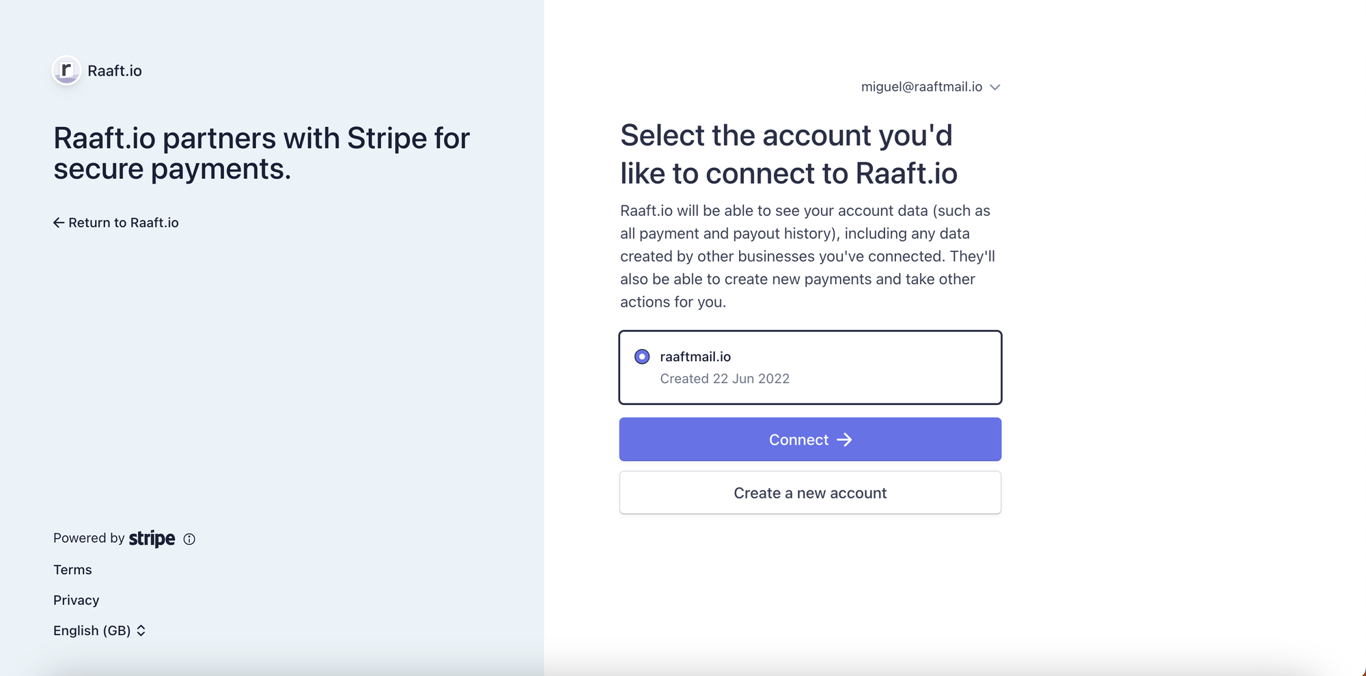
And you’re done! 🎉
If you have any issues at any point, feel free to write us at hello@raaft.io or reach out via the chat in the bottom-right corner of the screen of the app.
You can confirm the account is connected in your Dashboard. The link below Connect a Payment Processor should be highlighted in green and with a check mark.
Once you’ve connected your Stripe account, the next step is to create a Flow.
 Made with Bullet