Getting Started
SaaS Cancellation FlowsHow Raaft works
Connecting your Payment Processor


Technical Set Up
Creating Flows
What is a FlowRetention OffersMultiple active FlowsFAQsUsing the Raaft App
DashboardReportingCustomers At-riskZapier IntegrationConnecting Braintree
Connecting your Raaft account to Braintree is pretty simple.
Step 1: Select Braintree as your Payment Processor
The first step is to open the payment processor connection pop-up.
You can do this in 2 ways:
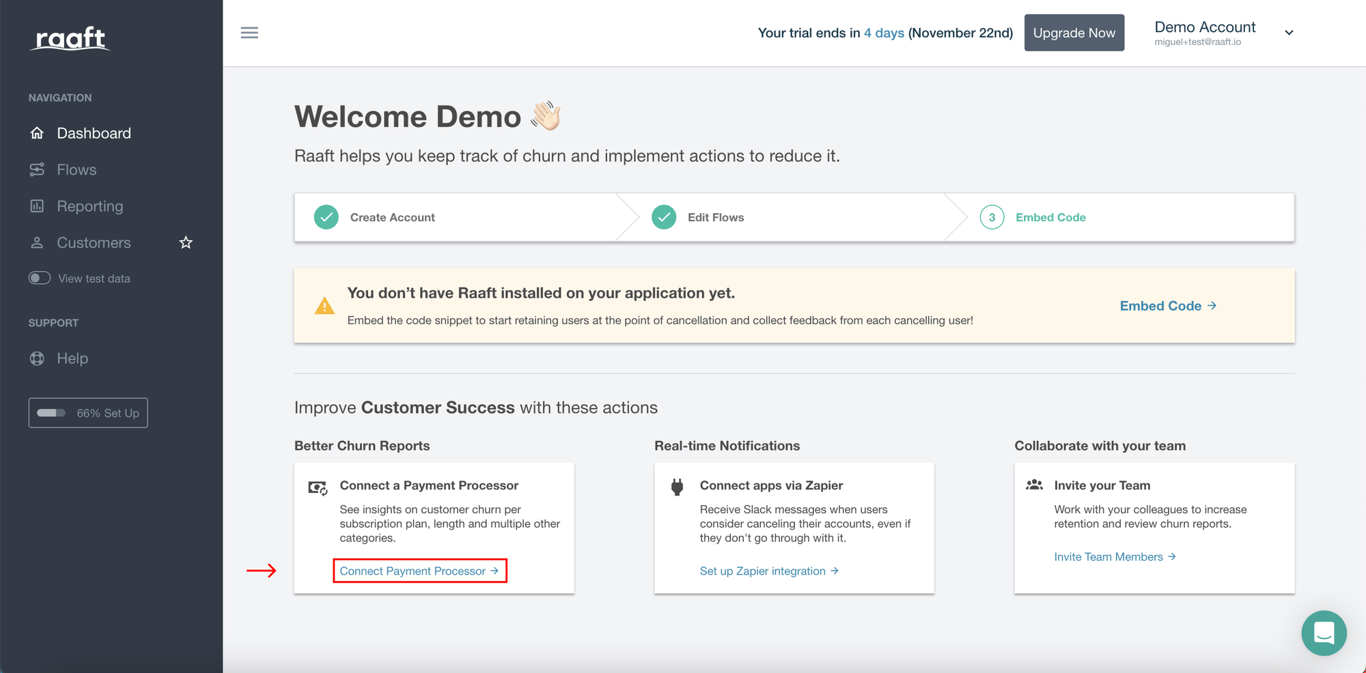
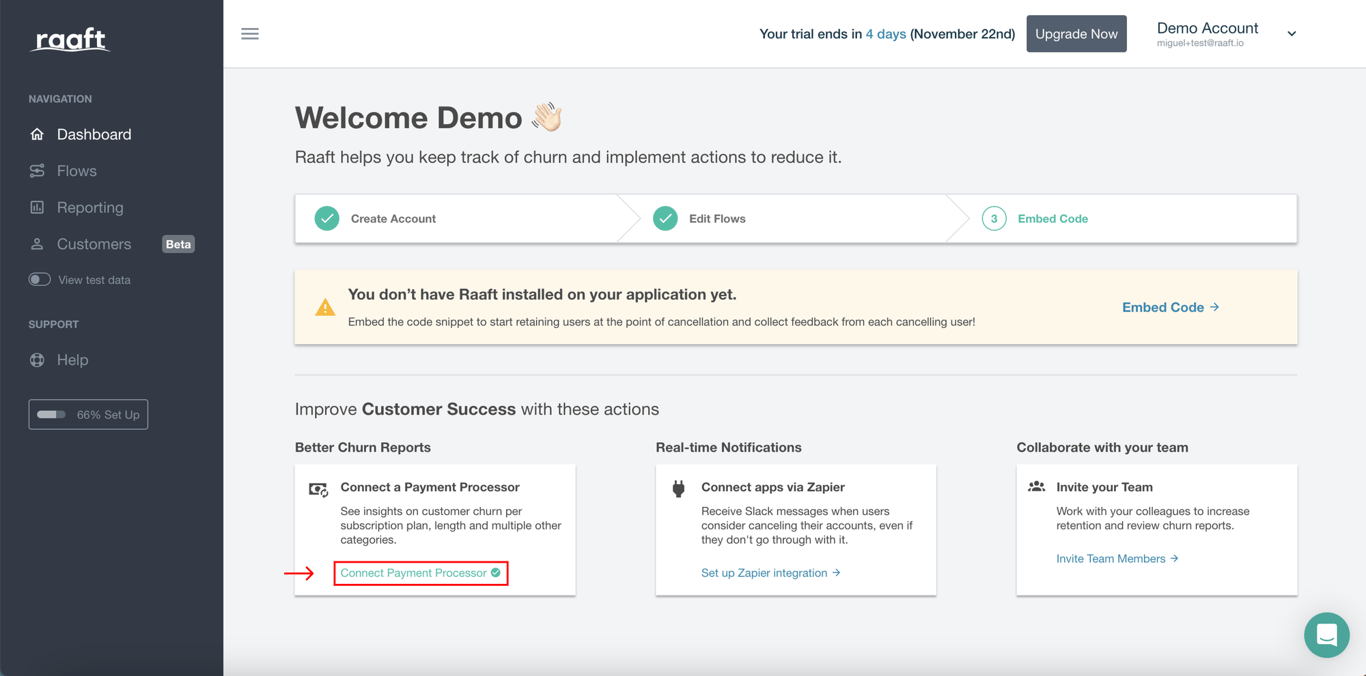
- From your Dashboard, if you just created an account and don’t have data yet you can just click on Connect Payment Processor.
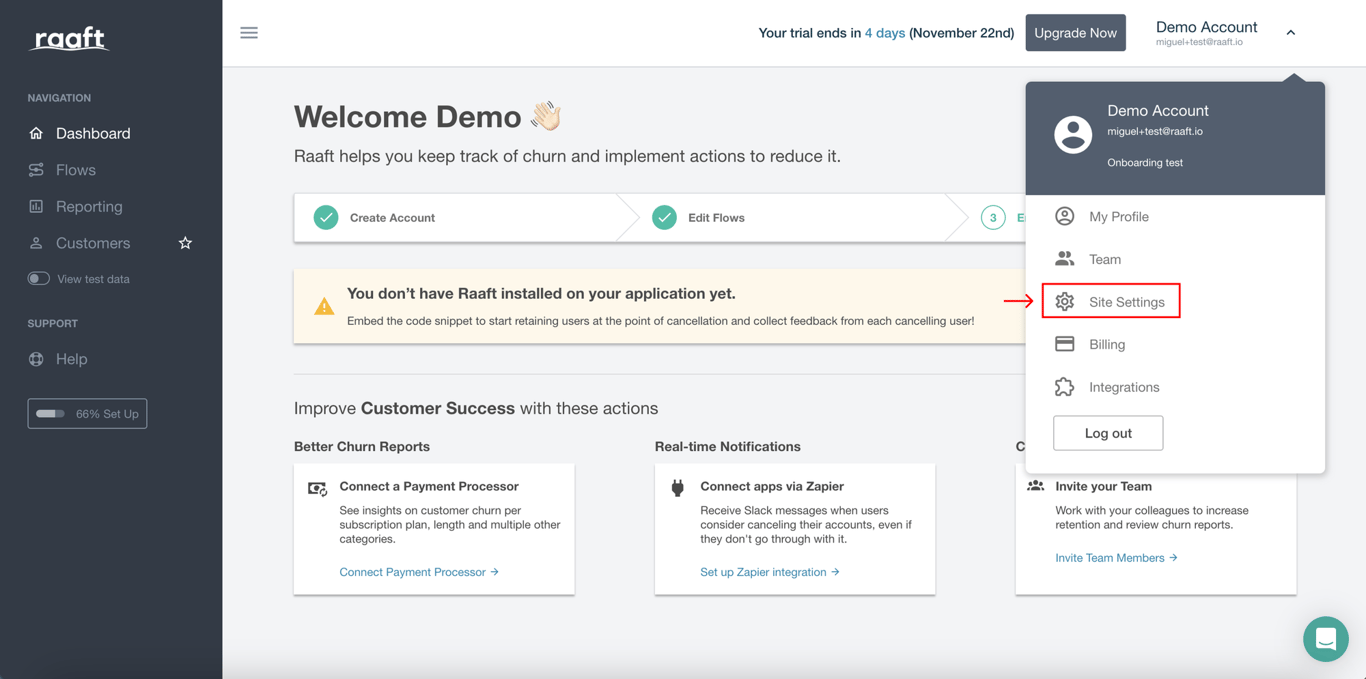
- From your navigation bar, click on your Account Name on the top-left to open the dropdown menu and then click on Site Settings.
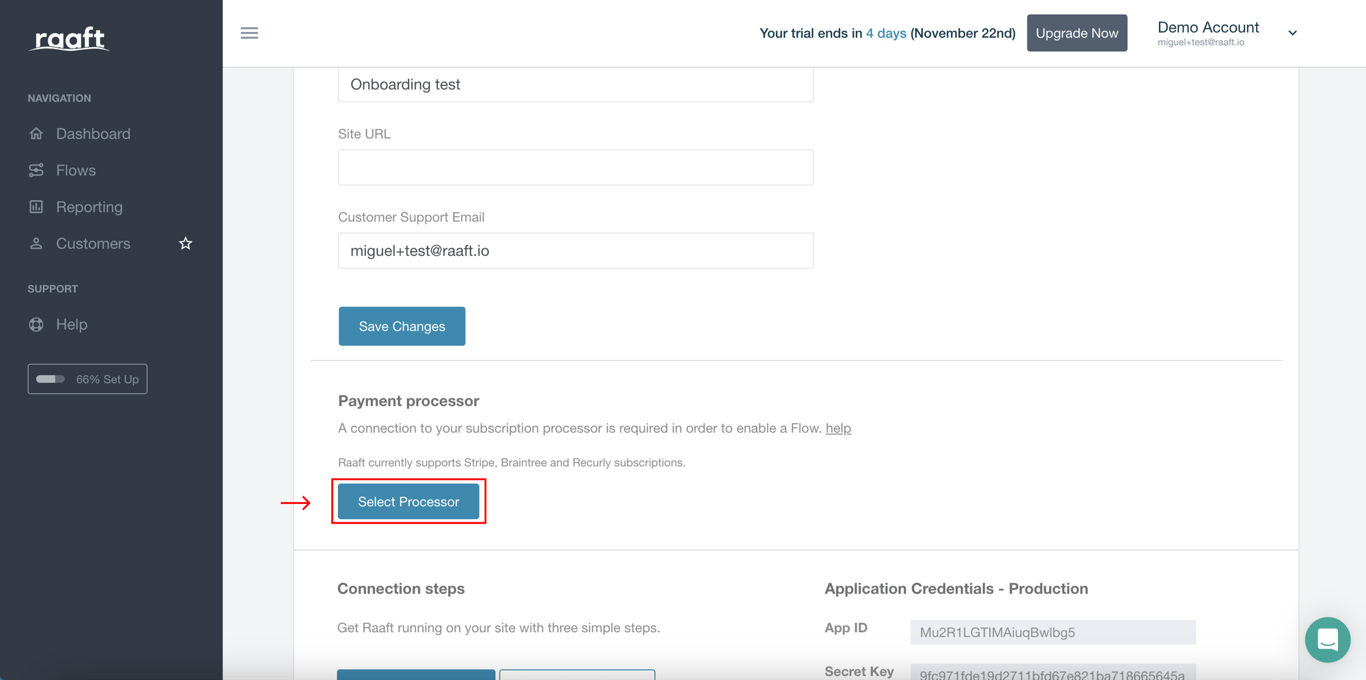
Then, scroll down to the Payment processor menu and click Select Processor.
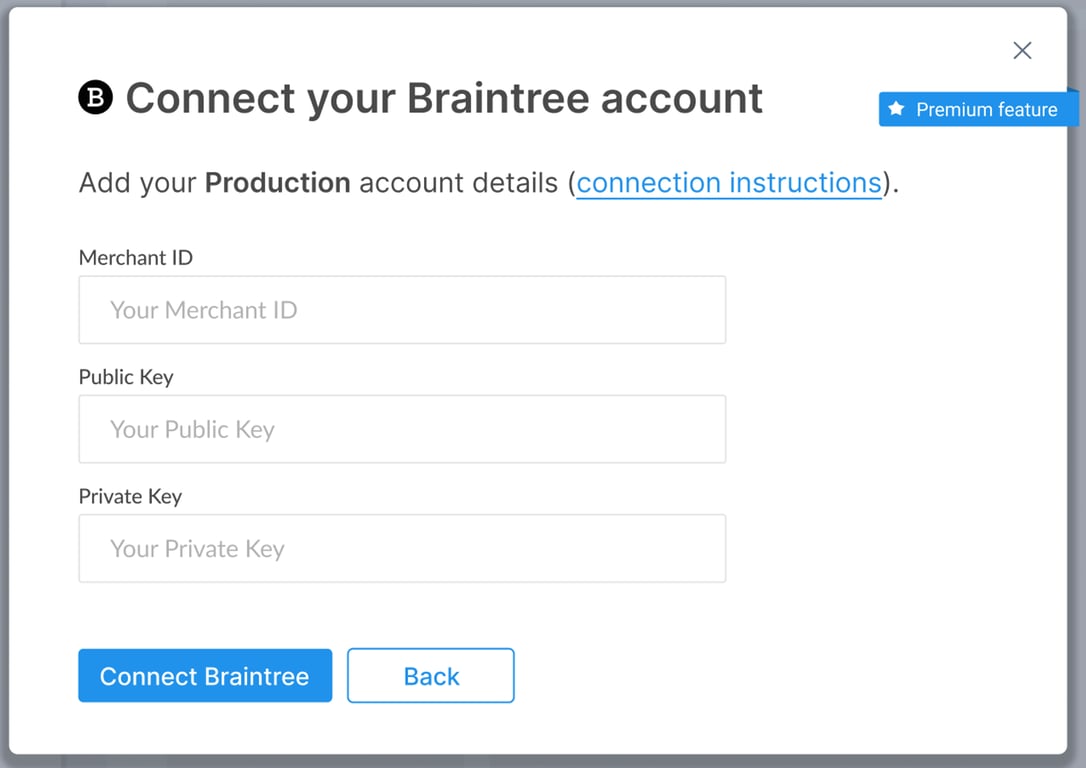
Using any of the methods above, you’ll see the following pop-up. Select Braintree as your payment processor.
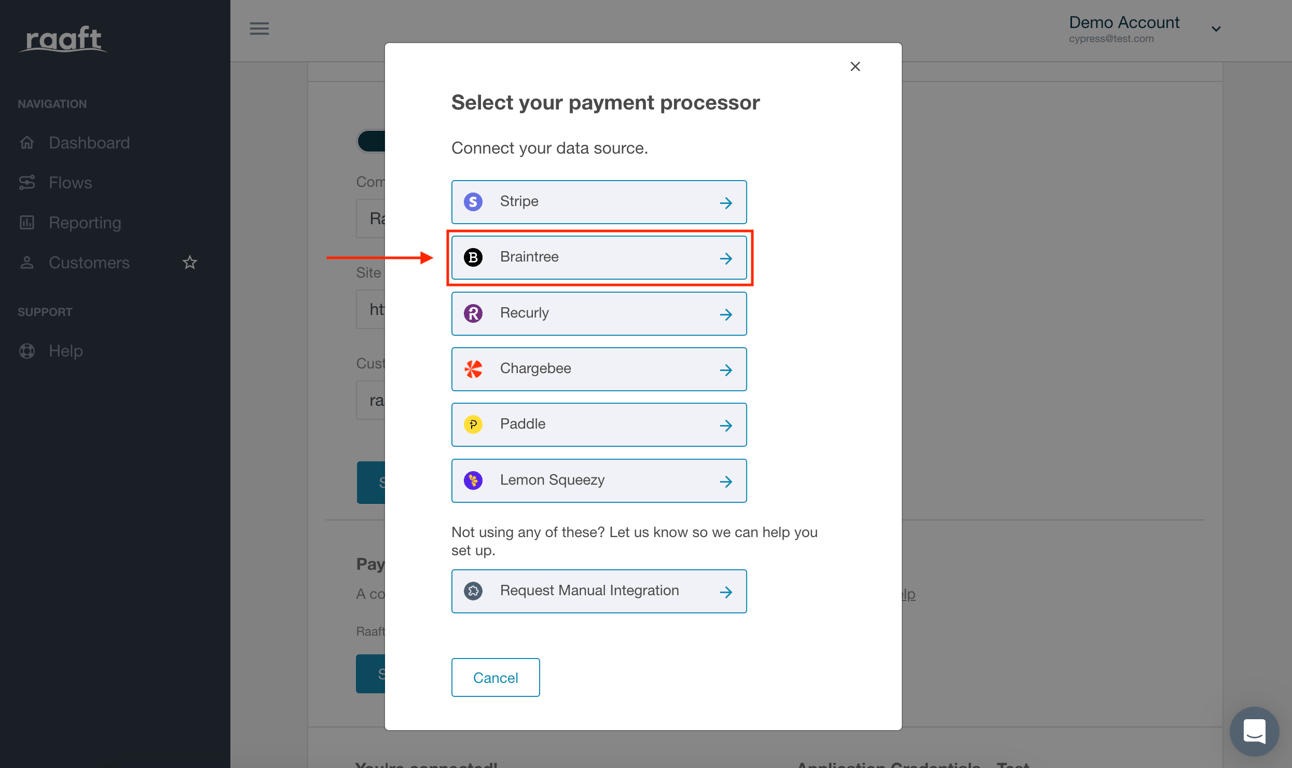
To connect to Braintree, you need to fill in the text fields with your Merchant ID, Public Key and Private Key, which you will create in the next steps.
Step 2: Setup Braintree Permissions
Setting up Braintree permissions requires 2 steps: (1) creating a role with the set of permissions Raaft requires; and (2) creating a user to which we assign that specific role.
2.1 Create the Raaft role
Connecting to your Braintree account to Raaft requires the creation of a new Braintree´user with Raaft specific permissions.
On your Braintree account go to Settings > Users and Roles and click Manage Roles.
Then, create a new role.
Name the new role Raaft and grant it the following permissions:
Recurring Billing
- Manage Plans, Addons and Discounts (Add/Edit/Delete)
- Manage Subscriptions (Add/Edit/Delete)
Webhooks
- Manage Webhooks (Add/Edit/Delete)
Once you added these permissions, just click Create Role.
2.2 Create a new user with the Raaft role
To create a new user, start by going to Settings > Users and roles and click New User.
Then, configure the new user as the image below:
2.3 Locate your Braintree credentials
For the next step, you'll need your Merchant ID, your Public Key, and your Private Key.
Find your Public Key
On your Braintree account, click My User under Account (cog icon in the top right corner).
Select API from the drop-down menu and scroll to the API Keys section
If no API keys appear, click the Generate New API Key button.
Find your Private Key
Your Private Key is beside your Public Key, so you just need to scroll to the API Keys section and click the View link located in the Private Key column.
Find your Merchant ID
Your Merchant ID is beside the two above-mentioned credentials. So you just need to scroll to the API Keys section and click View link, located in the Merchant ID column.
Warning: For the connection to be successful, the environment (production or test) on the Raaft app and the Braintree platform must be the same.
If your Braintree account is in Sandbox environment, you will only be able to connect to Raaft in test environment. Similarly, a production account in Braintree connects to the production mode in Raaft.
Check our resources for more details about Production vs Test environments.
Step 3: Connect Braintree
Once you’ve completed the previous steps, copy each of the credentials and paste them on the pop-up we found on Step 1. Then, just click to connect.

And you’re done! 🎉
You can confirm the account is connected in your Dashboard. The link below Connect a Payment Processor should be highlighted in green and with a check mark.
When Raaft cancels a subscription on your behalf, Braintree will issue a braintree.WebhookNotification.Kind.SubscriptionCanceled webhook to your endpoint. This will indicate that you should mark the subscription as canceled in your app.
Braintree webhooks allow Raaft to display revenue retention totals.
- Navigate to Settings > Webhooks
- Click Create New Webhook
- Configure the new webhook with a destination URL of
Where <your-app-id> corresponds to the APP ID of your Raaft app, which you can find it on your Raaft Account > Site Settings
If you have any issues at any point, feel free to write us at hello@raaft.io or reach out via the chat in the bottom-right corner of the screen of the app.
Once you’ve connected your Recurly account, the next step is to create a Flow.
 Made with Bullet