Getting Started
SaaS Cancellation FlowsHow Raaft works
Connecting your Payment Processor


Technical Set Up
Creating Flows
What is a FlowRetention OffersMultiple active FlowsFAQsUsing the Raaft App
DashboardReportingCustomers At-riskZapier IntegrationTest Flows page
How to access the Test Flows page
The easiest way to test whether a flow is working correctly is by using Raaft’s Test Flows page.
This page is a great first step to test Flows, before implementing them in your own web application.
You can access it by navigating to the Flows page, under the Embed Code tab.
.png?table=block&id=81890cb3-1d9a-4187-b518-165cfd26cc14&cache=v2)
Since you can be sure there are no deployment / installation issues, you can easily figure out missing details, inactive flows, subscriptions or other minor errors.
Heres’ what the page looks like when you open it.
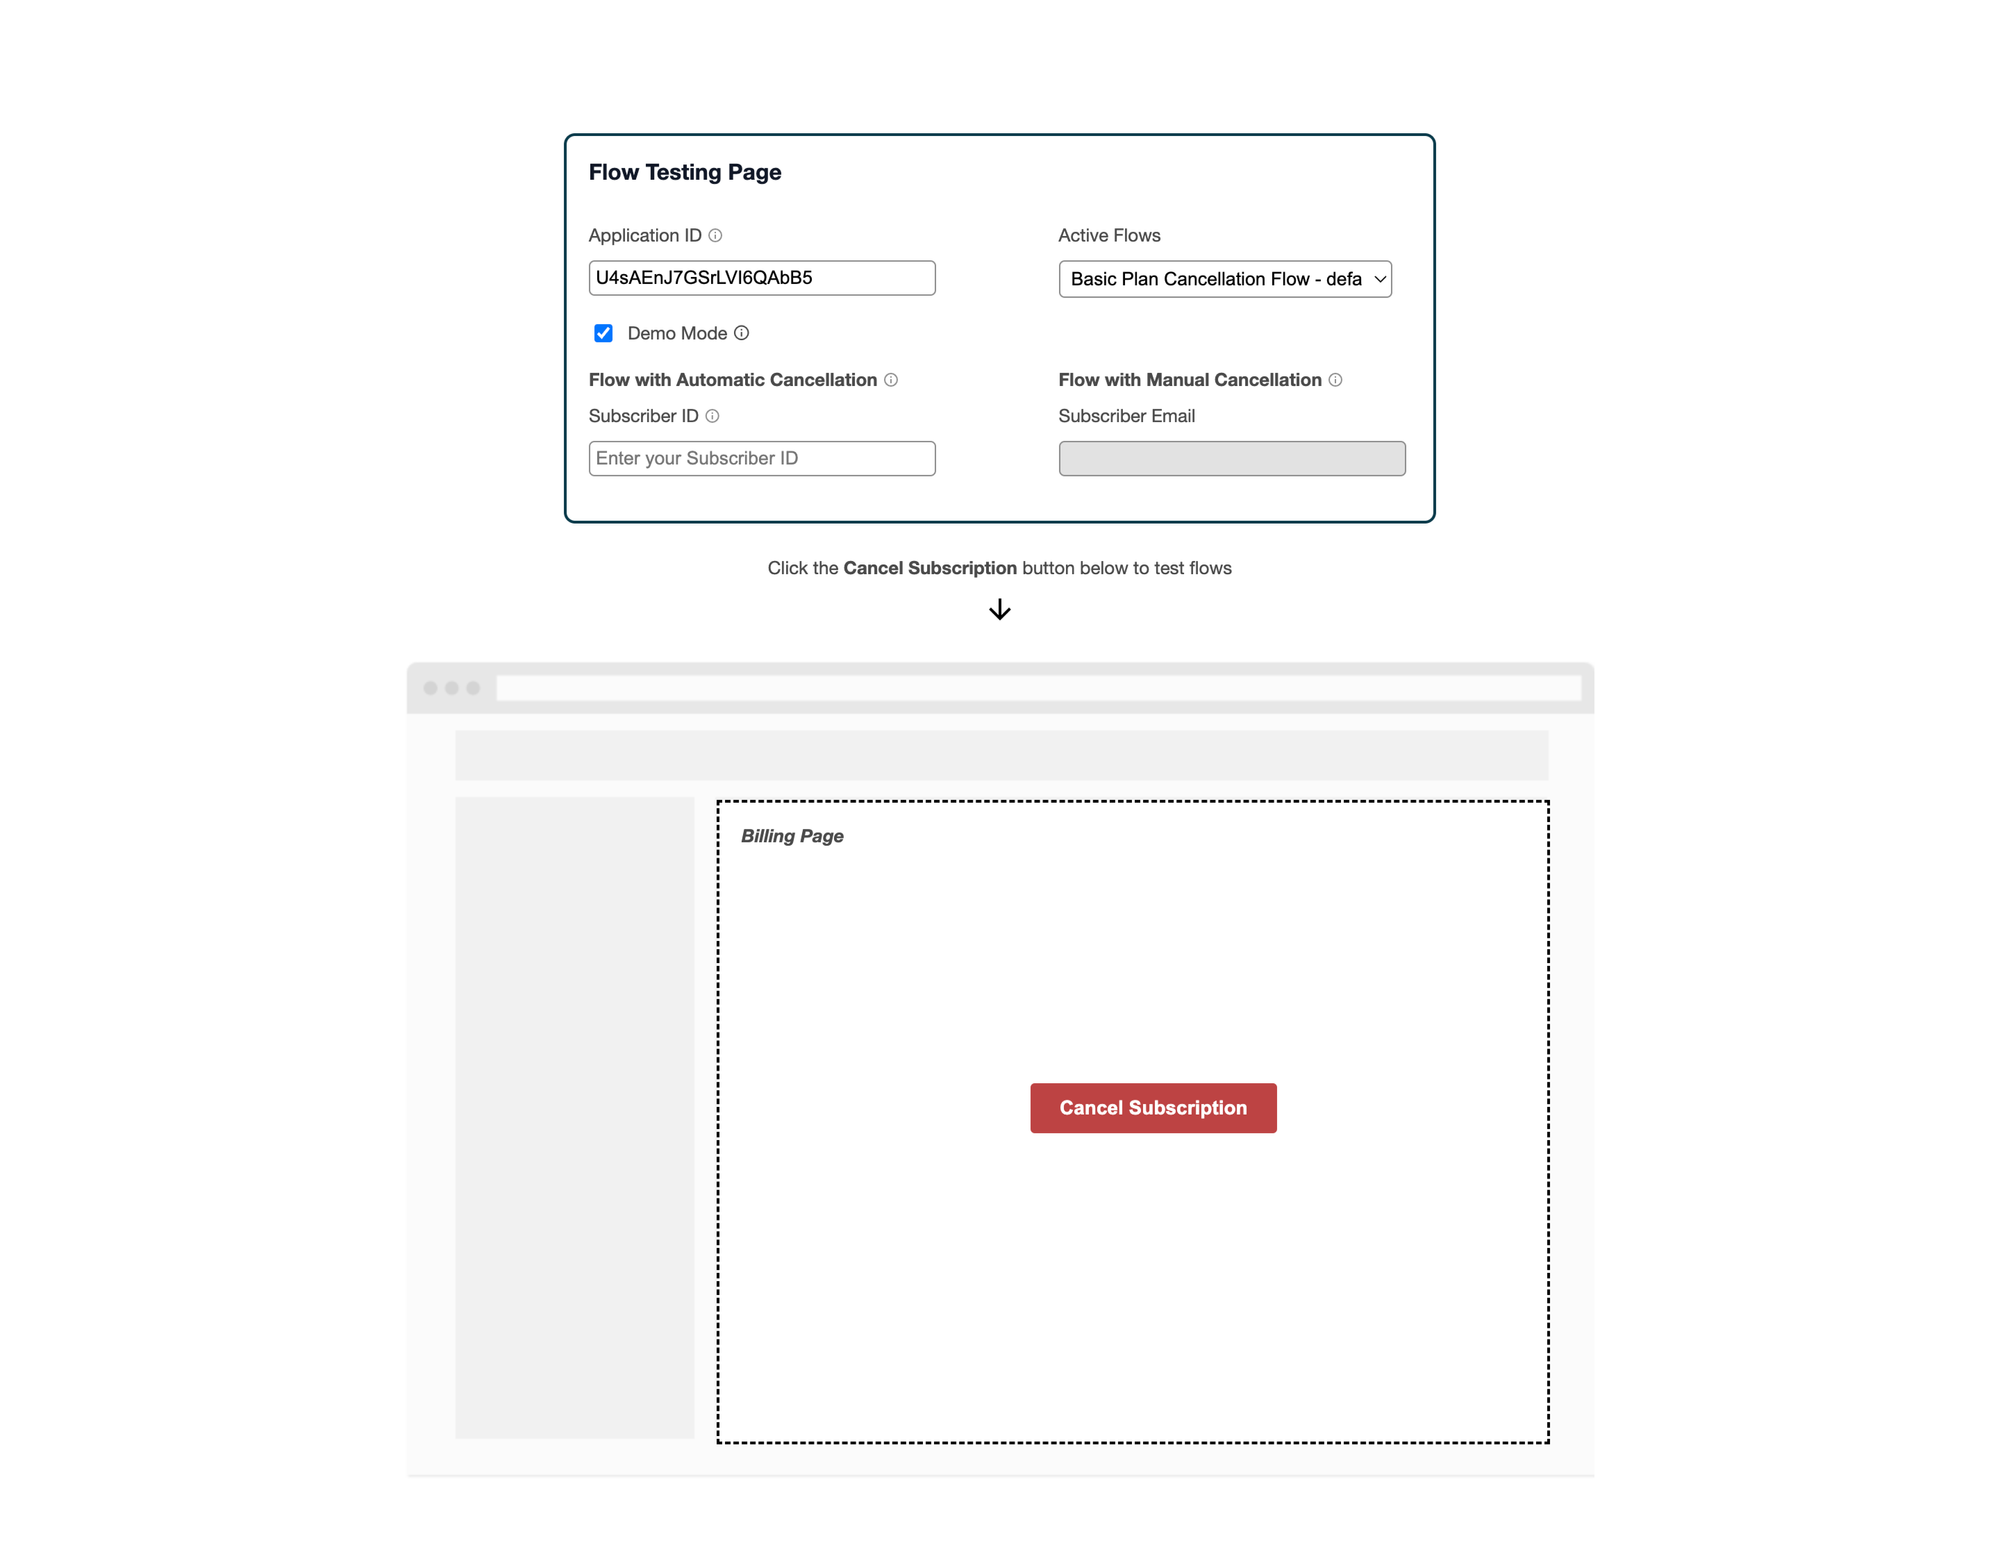
Test Flows page parameters
There are 4 main parameters in the test flows page:
Application ID (text field)
This field should be automatically populated if you click on the “Test Flows Page” button mentioned above, in the Embed Code section.
If you’re an engineer, you might noticed that the
Application ID is read from the URL parameter appId. Each Raaft account has 2 different Application IDs: one for the test environment account and another for the production environment account.The
Application ID field is used to retrieve the Active Flows for the dropdown field in front of it.Warning
The Test Flows Page generated has a different Application ID if you open it from your Raaft’s Dashboard in test environment versus production environment.
Active Flows (dropdown field)
This is a dropdown field which checks the
Application ID and retrieves the Active Flows that correspond to that specific application.Why is my dropdown field Active Flows empty?
If the Active Flows field is empty, it means that Raaft was not able to find any Flows based on the Application ID that are Active.
By default, Flows are Inactive. So, when this happens it’s usually because you have not yet manually marked any Flow as Active.
Warning
Notice that Test and Production environments have a different set of Flows. So, if you mark a Flow in Test environment as Active, that change will not impact any Flow in Production environment and vice-versa.
Demo Mode (checkbox field)
This checkbox is a setting that helps debug the Flow’s behavior. It’s marked as
true by default (checked).If the Flow is launched when this option checked, it means that no outcome will be recorded by Raaft. If a Flow is opened and a subscription is cancelled, nothing will actually occur behind the scenes.
No communication will be made with any external systems (payment processor, Zapier, etc.).
This is ideal to test the behavior of the widget.
Subscriber ID / Email (text field)
This field specifies the subscriber with which the Flow is being tested.
There are 2 different types of Raaft Flows based on the Outcome they produce:
- Cancel Automatically. This is the most common case. In these flows, Raaft processes cancellations, coupons, pauses and plan switches directly with the payment processor.
- Send an Email to Customer Support. In these flows, Raaft simulates the cancellation process, but does not process any changes with the payment processor. Instead, all it does is send an email to a specified Support email with all the details of the Flow session.
You can check the Flow type in your Flows page, under the Outcome column.
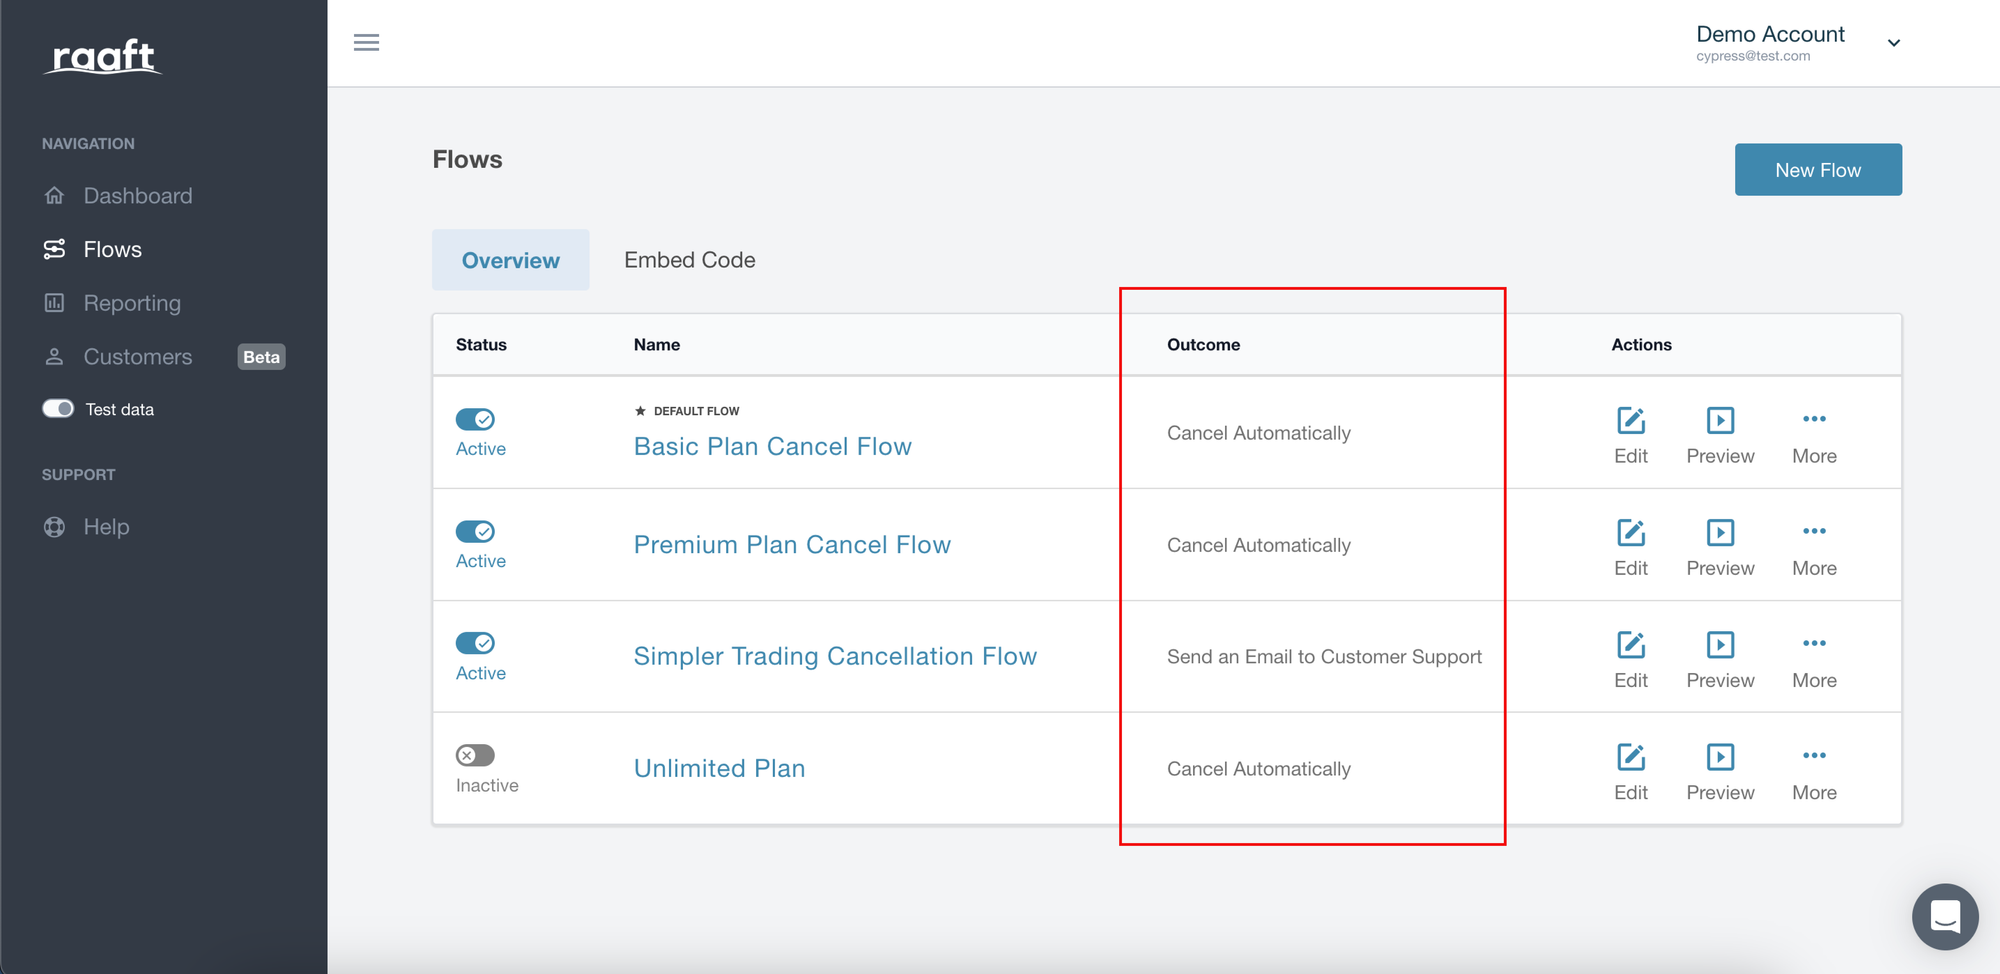
This distinction is important because different types of Flows require different sets of information from users to process cancellations.
Cancel Automatically Flows require a Subscriber ID.

Send an Email to Customer Support Flows require a Subscriber Email.
.png?table=block&id=9a8dff85-cb1e-451c-90a9-23129bb19ee7&cache=v2)
The Subscriber field that corresponds to the type of Flow selected in the dropdown field is automatically enabled (and other wrong one is disabled).