Getting Started
SaaS Cancellation FlowsHow Raaft works
Connecting your Payment Processor


Technical Set Up
Creating Flows
What is a FlowRetention OffersMultiple active FlowsFAQsUsing the Raaft App
DashboardReportingCustomers At-riskZapier IntegrationInstalling Raaft
This article walks you through the steps to set Raaft up on your product.
Before you begin - make sure to use the correct environment (production vs test) for the site you are configuring.
[Before Installing]
Start by logging in to your Raaft account. Once you're logged in, you need to configure your payment processor and the Flow your subscribers will see when cancelling.
Connect a Payment Processor
The first step to using Raaft typically is to connect a payment processor. While this is not strictly required to do before the other steps, it will enable some features and prevent additional work.
Click below to see connection instructions of how to do this:
Create and Activate a Flow
To create a Flow, go to the left sidebar menu and click Flows. Then, click on the button that says New Flow.
Go through the steps to configure, name and save your Flow.
When you're done, click the toggle on the left-side to make it Active.
________
Embed the Flow in your App
On the same page, navigate to the Embed Code tab where you will find the instructions with the 3 steps to integrate Raaft.
The setup steps allows you to copy customized code for your app. Just make sure you are in the correct environment.
Step 1 - Add the Embed Script
Copy the embed code and paste it before the
</body> tag on each page of your app where you want customers to be able to initiate a cancellation.<script> var RAAFT_APP_ID="U4sAEnJ7GSrLVI6QAbB5"; // YOUR PROD ENVIRONMENT" (function(r,aa,f,t,dot,i,o) { r[dot] = r[dot] || function() { (r[dot].q = r[dot].q || []).push(arguments); }; r[dot].l = 1 * new Date(); i = aa.createElement(f); o = aa.getElementsByTagName(f)[0]; i.id = 'raaftScript'; i.async = 1; i.src = t; o.parentNode.insertBefore(i, o); })(window, document, 'script', '//app.raaft.io/include.js?appId='+RAAFT_APP_ID, 'raaft'); </script>
Step 2 - Generate the Security Token
Calculate the security token on the server side of your application. Select your server side technology to view sample code.
You can learn more about the Security Token here.
____
There are 2 slightly different code snippets you should use, depending on the type of Flow you have.
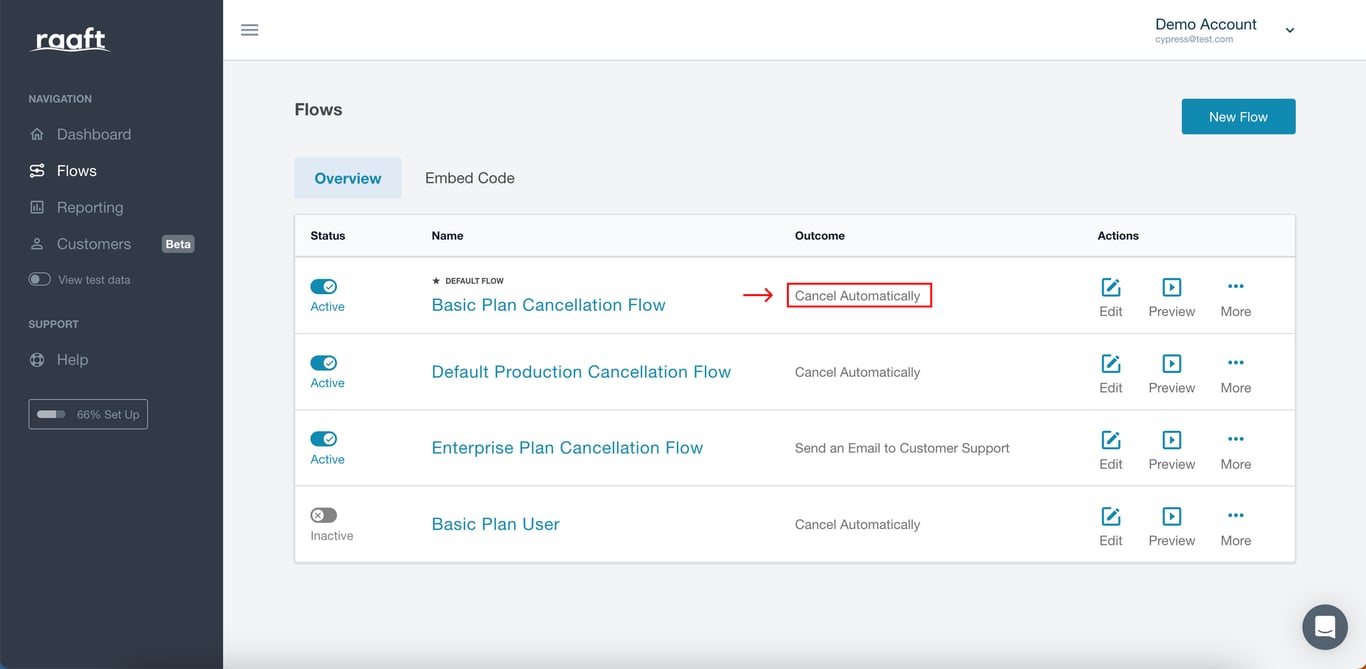
In order to know which of the code snippets to use, just check the column “Outcome” in your Flows menu.
If it’s set to “Cancel Automatically” (as below) you should pass as a parameter the subscription_id. This is the of your subscriber as defined by your payment processor (ex: Stripe).
Code Snippet for “Cancel Automatically”
Node.js
const crypto = require('crypto');
const raaft_secret = 'b56d6b6c8e7d550beeb4dd6b522134d37ec36add196bb32c0562d13aaaa2f5b7'; // secret key (keep safe!)
const subscription_id = 'INSERT_SUBSCRIPTION_ID_HERE'; // provided by your payment processor

crypto.createHmac(
   'sha256',
   raaft_secret
).update(subscription_id).digest('hex');
Ruby on Rails
raaft_secret = "b56d6b6c8e7d550beeb4dd6b522134d37ec36add196bb32c0562d13aaaa2f5b7" # secret key (keep safe!)
subscription_id = "INSERT_SUBSCRIPTION_ID_HERE" # provided by your payment processor

OpenSSL::HMAC.hexdigest(
   'sha256',
   raaft_secret,
   subscription_id
)
PHP
$raaft_secret = 'b56d6b6c8e7d550beeb4dd6b522134d37ec36add196bb32c0562d13aaaa2f5b7' // secret key (keep safe!)
$subscription_id = 'INSERT_SUBSCRIPTION_ID_HERE' // provided by your payment processor

hash_hmac(
   'sha256',
    $subscription_id,
    $raaft_secret
);
Django (Python)
import hmac
import hashlib

raaft_secret = 'b56d6b6c8e7d550beeb4dd6b522134d37ec36add196bb32c0562d13aaaa2f5b7' # secret key (keep safe!)
subscription_id = 'INSERT_SUBSCRIPTION_ID_HERE' # provided by your payment processor
hmac.new(
    raaft_secret,
    subscription_id,
    digestmod=hashlib.sha256
).hexdigest()
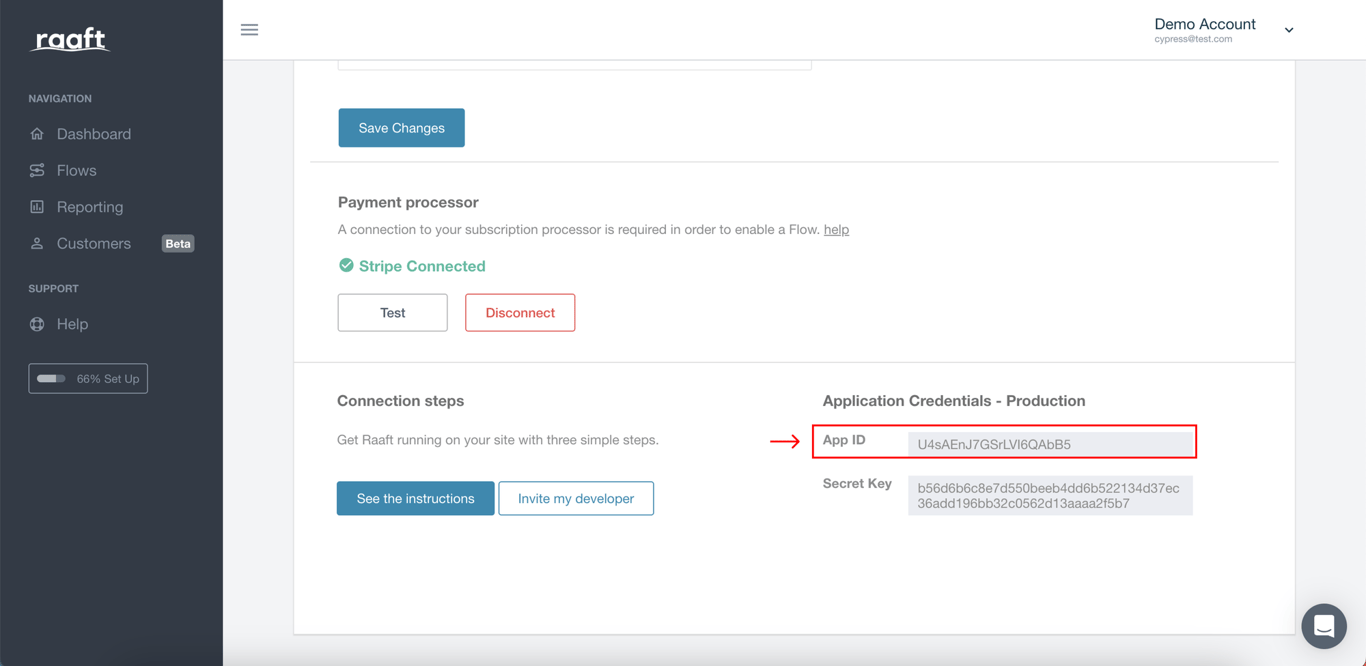
If it’s set to “Send an Email to Customer Support”, you just need to provide the app_id. You can find this by clicking on your account name, on the top-right corner, clicking Site Settings and then scrolling all the way down to the bottom to see the app_id field.
Code Snippet for “Send an Email to Customer Support”
Node.js
const crypto = require('crypto');
const raaft_secret = 'b56d6b6c8e7d550beeb4dd6b522134d37ec36add196bb32c0562d13aaaa2f5b7'; // secret key (keep safe!)
const app_id = 'U4sAEnJ7GSrLVI6QAbB5';

crypto.createHmac(
   'sha256',
   raaft_secret
).update(app_id).digest('hex');
Ruby on Rails
raaft_secret = "b56d6b6c8e7d550beeb4dd6b522134d37ec36add196bb32c0562d13aaaa2f5b7" # secret key (keep safe!)
app_id = "U4sAEnJ7GSrLVI6QAbB5"

OpenSSL::HMAC.hexdigest(
   'sha256',
   raaft_secret,
   app_id
)
PHP
$raaft_secret = 'b56d6b6c8e7d550beeb4dd6b522134d37ec36add196bb32c0562d13aaaa2f5b7' // secret key (keep safe!)
$app_id = 'U4sAEnJ7GSrLVI6QAbB5'

hash_hmac(
   'sha256',
    $app_id,
    $raaft_secret
);
Django (Python)
import hmac
import hashlib

raaft_secret = 'b56d6b6c8e7d550beeb4dd6b522134d37ec36add196bb32c0562d13aaaa2f5b7' # secret key (keep safe!)
app_id = 'U4sAEnJ7GSrLVI6QAbB5'
hmac.new(
    raaft_secret,
    app_id,
    digestmod=hashlib.sha256
).hexdigest()
Step 3 - Launch your Flow
Finally, replace your cancel button's current action with a call to the Raaft JavaScript api ensuring to replace <processor-subscription-id> with the canceling customer's subscription id and the <security-token> with the value you calculated in Step 2.
____
Again, there are 2 slightly different snippets of code. The logic to decide which step to use is just the same as the previous step.
If your Flow is set to “Cancel Automatically”, use the first one.
Code Snippet for “Cancel Automatically”
document.getElementById('BUTTON_ID').addEventListener('click', function() {
   window.raaft('startCancelFlow', {
       authKey: '<insert-security-token>', // generated in step 2
       subscriptionId: '<insert-subscription-id>' // same from step 2
   })
})
Otherwise, use the second one and provide the customer details as a parameter.
Code Snippet for “Send an Email to Customer Support”
document.getElementById('BUTTON_ID').addEventListener('click', function() {
   window.raaft('startCancelFlow', {
       authKey: '<insert-security-token>', // generated in step 2
       customer: { email: '<your-customer-email>' }
   })
})
_____
That's It!
Raaft will immediately begin guiding canceling customers through your custom Flow.
If you have any issues at any point, feel free to write us at hello@raaft.io, book a call for Support help or reach out via the chat in the bottom-right corner of the screen of the app.